Moving graphs to RAMDISK

The main usage load for disks, on which the system is installed on, is the generation of graphs in 5 minute intervals. For each client at minimum 2 graphs are created. For the routers at minimum 5 graphs are created in relation to the count of interfaces. Graphs are stored in binary form on the HDD and take up to 500KB of space. Therefore in practice the system needs to work with a large number of small files in which every 5 minutes informations about transmitted data and measured values are written. For a larger number of graphs SAS disk drives are recommended. SAS drives are significant faster, in working with small files, then SATA drives. Basically it is about the IOPS that the disks are able to provide to the system. In practice SATA disks are able to provide up-to 100 IOPS , SAS on the other hand are able to provide up-to 150-180 IOPS (depending on whether it is a 10k or 15k disk). The sum of IOPS can only be increased by the number of disks in RAID or by installing SSD disks for system graphing. IOPS is the main limitation for working with graphs. If the sum of IOPS is insufficient, the system latency is going to be increased and in some cases sites may load slower because the system is waiting for the HDD to be able to read and write. In this case an increase of RAM or CPU upgrade will not help. The only possibility is to increase the number of disks ( or replace the slow SATA drives with faster 15k SAS drives ).

  • It is now possible to move generated graphs to a RAMDISK. A Ramdisk is a self-contained part in memory, that behaves like a disk but Access times are several times faster than a conventional HDD, because it only uses RAM memory to store the data. If graph generation is run within RAMDISKS the IOPS and the disk usage will be significantly reduced. This is the most noticeable in large installations ( 1000 clients or more). In this cases we recommend moving graphs to a RAMDISK.
  • To work with RAMDISK, run this utility
/usr/local/script/ispadmin/rrd_ramdisk.pl
  • To display a help message, run it without any parameters
  • Usage:
/usr/local/script/ispadmin/rrd_ramdisk.pl initialize - Initialize RAMDISK
/usr/local/script/ispadmin/rrd_ramdisk.pl destroy - Destroy RAMDISK permanently
/usr/local/script/ispadmin/rrd_ramdisk.pl start [force] - Start RAMDISK
/usr/local/script/ispadmin/rrd_ramdisk.pl stop - Stop RAMDISK
/usr/local/script/ispadmin/rrd_ramdisk.pl save [force] - Save RAMDISK data to backup
/usr/local/script/ispadmin/rrd_ramdisk.pl check - Check RAMDISK usage
/usr/local/script/ispadmin/rrd_ramdisk.pl set - Set RAMDISK in MByte
/usr/local/script/ispadmin/rrd_ramdisk.pl restore [backup.file] - Restore RAMDISK from last backup.file
  • You may use the following parameters:
    • initialize - Initializes the RAMDISK and moves the data to the RAMDISK.
    • destroy - Unistalls the RAMDISK and moves the data back to the drive.
    • start - For an automatic start after booting. Use [force] to initialize RAMDISK even if the size of the restored backup is smaller by more than 5% than the previous ramdisk size, or if RAMDISK initialization was not successful after server reboot, and you need to initialize RAMDISK from the console.
    • stop - Makes an automatic backup of the data in RAMDISK, copies the backup to a Hardrive, and stops RAMDISK. !!! We strongly recommend that you perform it every time you restart/switch off the system !!!
    • save - Makes a backup of data of the RAMDISK to a Hardrive - performed automatically once a day, 10 backups are done retrospectively, and you may restore them later. Moreover, 2 monthly backups (as of 28th of each month) are stored.
      (It backups into /usr/local/script/ispadmin/rrd_data_backup/. Use [force] to make a backup of ramdisk which is smaller than the previous ramdisk in size, e.g. if you deliberately delete more files with graphs. A check on 5%-difference compared to the original size is performed.)
    • check - Checks the utilization of the RAMDISK and if needed, it automatically increases the RAMDISK.
    • set - Set RAMDISK size in MB to increase it according to your needs.
    • restore - Insert name of backup file from backup directory for rrd ramdisk to restore a daily backup of rrd data. If no name is inserted, the system will restore the last known backup from this directory. You may use data restore if you loose it, or the data is incomplete. The only must is initialized RAMDISK.
  • When RAMDISK is installed, you need to run the following command:
/usr/local/script/ispadmin/rrd_ramdisk.pl initialize
    • This initializes and configures all that is needed. After rebooting the sytem it installs the RAMDISK again and the data are moved on to it.
    • Be aware that the data on a RAMDISK is saved in RAM and if a server malfunction occurs ( powersuply malfunction ) all data are lost. In the case of correct restart, the system automatically backs up data to the Hardrive an moves it onto the RAMDISK after booting. The system also makes an automatic backup onto a hardrive once a day. So in case of power supply outage, one-day data only is lost.
    • For RAMDISK creation it is absolutely necessary to have a sufficient amount of RAM. The maximum amount of RAM that can be used for the RAMDISK is 25%.
    • The necessary amount of RAM is calculated dynamically according to occupied disk space (mostly 510Mb - 5GB). If the calculation for RAM is resulting in a larger amount then 25%, the RAMDISK is not created and it is necessary to upgrade the amount of RAM. If RAMDISK capacity is more than 80% full, the system will try to increase the disk automatically (if RAM is sufficient). If it fails, you may increase RAMDISK manually using set option.

Configuration / update of IP Address


A) Temporary setting of IP address (until next Linux restart).
Just add the following two commands for settings of IP/mask and default gateway:


ifconfig eth0 192.168.1.100 netmask 255.255.255.0 # setting of IP address and mask
route add default gw 192.168.1.12 # setting of default gateway


B) Permanent setting of IP address
Modify the current IP address to the one you want:


nano /etc/rc.local
nano /etc/hosts
nano /etc/apache2/httpd.conf
reboot -f # system restart


Cache-only DNS server

Caching-only is ready after installation of ISPadmin. It is sufficient to use IP of ISPadmin as DNS server, and the system will then contact DNS servers in the Internet.
Type 0.0.0.0/0; (or type specific networks for which the DNS server should serve as cache) in /etc/bind/named.conf.options. We recommend that you list specific networks for which you want to use the ISPadmin as DNS server. If you allow to use ISPadmin for all networks (0.0.0.0/0) its services may be abused by anybody for e.g. DDOS attacks.

nano /etc/bind/named.conf.options

allow-query { 192.168.0.0/16; 10.0.0.0/8; 127.0.0.1; 0.0.0.0/0; };

Then restart bind

/etc/init.d/bind9 restart

If ISPadmin is part of internal network, outcoming ports 53/TCP and 53/UDP must be enabled in a terminal router.

nano /etc/resolv.conf

nameserver 127.0.0.1

nameserver IP_DNS_of_used_server

Set DNS servers from the Internet here. If your customers will use ISPadmin as DNS server, the system will work as Cache, and DNS queries will be translated by servers listed here. If IP address of name server is unknown, use Google name server (8.8.8.8).

Postfix mail server


By default, the SMTP server is configured in the way that it is only possible to send mail from localhost, so the server may be put onto a public IP address and nobody will be able to send their mail through it (spam). So ISPadmin does not send mail out (only locally).
Mail server configuration is done in /etc/postfix/main.cf:


nano /etc/postfix/main.cf


myhostname = identification name of your server for public identification - it should be identical to reverse DNS
mydestination = domains to be accepted by your server
relayhost = superior SMTP server
mynetworks = networks accepted by postfix for receiving emails without authentication for further processing (relay, local, etc.).


Postfix service must be restarted every time you modify configuration file:


/etc/init.d/postfix restart

To set up mail via external SMTP server, you have to enter IP address of this server to Postfix SMTP service configuration in ISPadmin. Authentication is not possible in Postfix so you have to enable ISPadmin for sending mail without authentication to superior SMTP server.
Edit relayhost in /etc/postfix/main.cf configuration file of Postfix server:


relayhost = SMTP_SERVER # IP address of superior mail server


Now restart the service:


/etc/init.d/postfix restart


From now on, all emails from ISPadmin will be forwarded to the Internet via superior SMTP server.

First of all, test if target mail server answers where it should by telnet command. In other words, if the service is available. It may happen that server becomes unavailable due to firewall congestion, domain names collision etc.
These are the most common reasons for problems with sending/receiving emails.


telnet mail_server 25


Console listings in case of server availability:

admin.ispadmin.cz:~# telnet demo.ispadmin.eu 25
Trying 95.173.193.36...
Connected to demo.ispadmin.eu.


Console listings in case of server unavailability: it is likely that some firewall on the route blocks port 25 used for mail.
 
admin.ispadmin.cz:~# telnet mail.test.cz 25
Trying 81.2.194.128...
telnet: Unable to connect to remote host: Connection timed out


So if SMTP server is available then check mail server log. Based on it, you can identify a specific problem, and rectify it. You can display Postfix service log, or mail queue with the following commands:

This listing will show you that record A on DNS server is wrong or not configured - Host or domain name not found.


tail /var/log/mail.log
admin.ispadmin.cz:~# tail /var/log/mail.log
Apr 1 11:18:01 admin postfix/pickup[11262]: 3AF4961C850: uid=0 from=
Apr 1 11:18:01 admin postfix/cleanup[12439]: 3AF4961C850: message-id=<This email address is being protected from spambots. You need JavaScript enabled to view it.>
Apr 1 11:18:01 admin postfix/qmgr[2225]: 3AF4961C850: from=<This email address is being protected from spambots. You need JavaScript enabled to view it.>, size=610, nrcpt=1 (queue active)
Apr 1 11:18:01 admin postfix/smtp[12441]: 3AF4961C850: to=<This email address is being protected from spambots. You need JavaScript enabled to view it.>, orig_to=, relay=none, delay=0.01,
delays=0.01/0/0/0, dsn=5.4.4, status=bounced (Host or domain name not found. Name service error for name=admin.ispadmin.cz type=A: Host not
found)
Apr 1 11:18:01 admin postfix/cleanup[12439]: 3C4D961C858: message-id=<This email address is being protected from spambots. You need JavaScript enabled to view it.>
Apr 1 11:18:01 admin postfix/bounce[11699]: 3AF4961C850: sender non-delivery notification: 3C4D961C858
Apr 1 11:18:01 admin postfix/qmgr[2225]: 3C4D961C858: from=<>, size=2552, nrcpt=1 (queue active)
Apr 1 11:18:01 admin postfix/qmgr[2225]: 3AF4961C850: removed
Apr 1 11:18:01 admin postfix/smtp[12441]: 3C4D961C858: to=<This email address is being protected from spambots. You need JavaScript enabled to view it.>, relay=none, delay=0.01, delays=0.01/0/0/0, dsn=5.4.4,
status=bounced (Host or domain name not found. Name service error for name=admin.ispadmin.cz type=A: Host not found)
Apr 1 11:18:01 admin postfix/qmgr[2225]: 3C4D961C858: removed


Check the queue with


mailq
Mail queue is empty


or with


postqueue -p
Mail queue is empty


You delete the queue with


postsuper -d ALL

If domain name translation does not work, neither sending mail can work. If you find the following record in mail server log you will have to configure domain name translation correctly:


tail -f /var/log/mail.log


Mar 4 10:25:46 admin postfix/error[19238]: A10D08A487A: to=<This email address is being protected from spambots. You need JavaScript enabled to view it.>, orig_to=, relay=none, delay=30,
delays=29/0.26/0/0.06, dsn=4.4.3, status=deferred (delivery temporarily suspended:
Host or domain name not found. Name service error for name=admin.ispadmin.cz type=MX: Host not found, try again)


You can check correct DNS translation with the following command. If DNS server does not respond to the query, yet IP does, the problem is here.


telnet mail.test.cz 25
Trying 81.2.194.128...
 
Modify configuration file:

nano /etc/resolv.conf
 
options single-request
nameserver 8.8.8.8
nameserver IP_DNS_of_used_server

And then restart service:

/etc/init.d/bind9 restart

Not only does DNS system support mechanism for translation of domain names to IP addresses but also for translation of IP addresses to domain names. Nowadays, this is primarily used for delivering of e-mail, when mail server, which receives a message from the client, firstly translates client IP address to a name (thus it can find out at least approximately who might that be) and then it will translate the acquired name back to IP address. If the real and acquired IP address does not correspond, it can consider the mail source untrustworthy and refuse it.
PTR records are important namely in the mail area, because some mail server presume and demand setting of PTR record. If PTR record is not set, the mail can be refused, classified as spam, or the score of tools of spam-assassin type will increase.
You usually set PTR records at your ISP, which either delegates you specific DNS branch to your own DNS server or which sets you PTR records on its own server.

For correct mail forwarding it is necessary to have correct MX records on your mail server, otherwise the mail does not have to be delivered to you.
How to find missing MX record:


# nslookup
> set q=mx
> net-service.cz
net-service.cz MX preference = 10, mail exchanger = sentinel.net-service.cz


If the reverse record does not work “Unauthorised response” notification is displayed.

If no emails go out from your network and you are sure the settings of a superior server is correct, check the following ID in Settings System Settings General:


  • smtp_restriction - SMTP port 25 blocking ISPadmin supports blocking outgoing mail via SMTP protocol on port 25 globally for your entire network. This setting is suitable to use as a defence against spam sending from infected client computers, when there is a thread of your inclusion to worldwide blacklists, superior provider can even disconnect you.
  • smtp_trust_servers - Allowed SMTP servers in network. Add trustworthy SMTP servers to the list of authorized servers. These servers will not be restricted when sending mail. You should see your main mail server as the first record. Other addresses usually are company mail servers of your clients.

Configuration of POSTFIX, which in ISPadmin and LK serves as SMTP server, does not require verification. For access control, however, a method "pop before smtp" is used.
So to make a client capable of sending mail correctly, he has to first log into pop3 account (this way mail clients such as MS Outlook and etc. behave). Otherwise smtp server takes over only post from localhost, that is why even on a public address there is no problem with spam. In configuration file, it is also possible to set, for which sub-networks smtp will not be verified, so that your clients can use it as smtp server without verification. Otherwise it is possible to set in the mail server configuration a superior smtp server, through which all emails created in ISPadmin will be sent.

System back-ups


ISPadmin has an automatic data back-up functionality. It is possible to store the backups locally (SW/HW RAID), but also on a remote repository (FTP, NFS, CIFS). It is advisable to store local backups on a partition different from the system one. If the system disk was fully used by backups, it might lead to a damage of the system.


Backup settings

It is done in Settings System Settings Backups.


System and router backup encryption

icon info2Router backup encryption is off after installation so you can turn it on by running an external script from linux console under root rights.

You can change/set the password with the following script:

/usr/local/script/ispadmin/ispadmin_backup_crypt.pl

If you set password value to -1 encryption will be turned off and it won´t be performed at next backuping.
You will be asked to provide email address during password setup/change. A message about changed password for backups will be sent to this email with both, old and new one. Do not delete this email or at least print out its content and thoroughly keep it somewhere since the password will be needed for restoring the data from a backup. There is no other way of getting or restoring it! Check if emails are sent from the system prior to changing the password. If sending fails no message with new and old passwords will be delivered to you.


System and router backups

You can create a backup and search already existing ones in Other Backups.

Manual system backup

You can run manual ISPadmin backup with

ispadmin_backup backup all

This command will execute a complete system backup into /data/backup/incremental/. The whole backup usually takes between 10 to 30 minutes depending on the number of clients, or the amount of backup data. If you have e.g. 8GB of backups and big server load, backups may take longer. However, you have to allow for a slowdown of a web interface during backup.

Run ispadmin_backup to display help for backup and restore script.

ispadmin_backup

+ - - - - - - - - - - - - - - - - - - - - [ ispadmin_backup ] - - - - - - - - - - - - - - - - - - - - - +

This script can help you to backup and recover of ISPamin backup easy way. Well, you can run script this way:

ispadmin_backup [help] [debug] [source-path=SRC-PATH] [path=PATH] MODE SCOPE [BID]

[PATH] Path to the ISPadmin's restore directory. Absolute or relative path can be used.
       Default path is root / !!.
[SRC-PATH] Path to the ISPadmin's source directory for recovery or Backup directory. Absolute path can be used.
           Default path is ISPadmin backup directory /data/backup/incremental/
[MODE] Determine function of script:
backup   - backup system
restore  - restore system from [PATH]

[SCOPE]
all      - recover or backup all files important parts of the ISPamin (auto mode for db, etc, data)
etc      - recover or backup files in /etc
db       - backup the binary MySQL database (only ispadmin,system,mysql db)  and  backup all dump database to  /db_dump
         - recovery the binary MySQL database (only ispadmin,system,mysql db)
db_dump  - recovery all dump databases
graph    - recover or backup graph data in ISPadmin (RRD files)
scripts  - recover or backup scripts of ISPadmin (/usr/local/script/ispadmin)
ispadmin - recover or backup ISPadmin data (/data/support)

[BID] Determine incremental level. If is not given, last backup will be executed as default.

First argument is required ( or backup all ) or second one is optional.
If recover MODE is not given, full recover will be executed as default!

And finaly, a simple example of usage:
   ispadmin_backup restore scripts 401
   ispadmin_backup path=/backup/graph/ restore all
   ispadmin_backup backup
   ispadmin_backup source-path=/home/toor/backup/ backup
 

+ - - - - - - - - - - - - - - - - - - - - - - - - - - - - - - - - - - - - - - - - - - (c) NET service solution, s.r.o.  - +


  • Usual backup of the whole ISPadmin into default directory /data/backup/incremental/

When run you will be asked if you really want to create backup:

ispadmin_backup backup all

Are you sure want to do the backup  - ALL to /data/backup/incremental/ !!?  [y/n]:

Listing of backup files:

ls -la /data/backup/incremental/

total 9
drwxr-xr-x 9 virtual virtual 1024 Mar 20 12:45 .
drwxr-xr-x 4 virtual root    1024 Mar 20 10:27 ..
drwxr-xr-x 2 virtual virtual 1024 Mar 27 09:55 db
drwxr-xr-x 2 virtual virtual 1024 Mar 27 09:55 db_dump
drwxr-xr-x 2 virtual virtual 1024 Mar 27 09:55 db_dump_last
drwxr-xr-x 2 virtual virtual 1024 Mar 27 09:55 etc
drwxr-xr-x 2 virtual virtual 1024 Mar 27 09:55 graph
drwxr-xr-x 2 virtual virtual 1024 Mar 27 09:55 ispadmin
drwxr-xr-x 2 virtual virtual 1024 Mar 27 09:55 scripts


  • Backup of the whole ISPadmin into a user directory, e.g. /new/backup

ispadmin_backup source-path=/new/backup backup all

Are you sure want to do the backup  - ALL to /data/backup/incremental/ !!?  [y/n]:

Listing of backup files:

ls -la /data/backup/incremental/

total 9
drwxr-xr-x 9 virtual root    1024 Mar 27 10:02 .
drwxr-xr-x 3 root    root    1024 Mar 27 10:02 ..
drwxr-xr-x 2 virtual virtual 1024 Mar 27 10:02 db
drwxr-xr-x 2 virtual virtual 1024 Mar 27 10:02 db_dump
drwxr-xr-x 2 virtual virtual 1024 Mar 27 10:02 db_dump_last
drwxr-xr-x 2 virtual virtual 1024 Mar 27 10:02 etc
drwxr-xr-x 2 virtual virtual 1024 Mar 27 10:02 graph
drwxr-xr-x 2 virtual virtual 1024 Mar 27 10:02 ispadmin
drwxr-xr-x 2 virtual virtual 1024 Mar 27 10:02 scripts


  • Backup of a system part (backup system is divided into sections as allowed for these options)

ispadmin - system ISPadmin (/data/support/ispadmin)
ispadmin_backup backup ispadmin

scripts - backup of ISPadmin scripts
ispadmin_backup backup scripts

graph - backup of all client graphs at day end, stored as static images. (/data/support/ispadmin/client_images/)
ispadmin_backup backup graph

etc - backup of entire linux config directory
ispadmin_backup backup etc

db - backup of binary DB - ISPadmin tables, system, mysql
    - backup of all dumped mysql databases into ./db_dump
    - newly created directory ./db_dump_last/, for storing currently dumped files from the last backup
ispadmin_backup backup db

alert icon Always back up your current data prior to any restoration.
icon info2 Important directories are: /data/support, /usr/local/script/ispadmin, /var/lib/mysql and /etc


From backup directory /data/backup/incremental/ to /. System data will be overwritten!!! So use it only in case that you have the ISPadmin data damaged and you want to replace them with the backup data.

alert icon If you are restoring complete data set to a new server with another Debian version we cannot recommend this restoration type since system configuration directories are restored in /etc and a different OS version may use different format and syntax for the files. So we recommend a partial restoration - see below. (no restoration of /etc followed by restoration of /etc to another place in the system with manual configuration of system settings - apache, hosts, dns,... ).


If your backups are encrypted you will be asked for password for backups, and the system will ask you again if you want to proceed with the restoration.

ispadmin_backup source-path=/data/backup/incremental/ path=/ restore all

Type Postcode password : Your_password_for_backups

Restore script started.

Recover will destroy actual data on the server! Do backup before the recovery is a good idea.
Are you sure want to do the restore  - from /data/backup/incremental/ directory to /  !!?  [y/n]:

This way you can restore data from the last full backup including the increments since the last full backup (if they are set).

alert icon For correct restoration, you have to have all previous backup data ready and working. It is not enough to copy just the last “5th day” of the backup with numerical identification. (e.g. Ispadmin_scripts.5.tar.gz)

 From user directory /data/backup/incremental/ to /. System data will be overwritten!!! So use it only in case that you have the ISPadmin data damaged and you want to replace them with the backup data.
Example: Today is March 30, 2012 and you want to restore data from March 27, 2012.
How to do it: You need to find out number of backup done on March 27, 2012. You will do so with:

ls -la /data/backup/incremental/ispadmin/

total 188712
drwxr-xr-x 2 virtual virtual     2048 Mar 29 07:51 .
drwxr-xr-x 9 virtual virtual     1024 Mar 27 10:55 ..
-rw-r--r-- 1 virtual root       13697 Mar 29 07:46 backup2l_ispadmin.conf
-rw-r--r-- 1 virtual root         390 Mar 26 10:55 Ispadmin_ispadmin.1.check
-rw-r--r-- 1 virtual root         107 Mar 26 10:55 Ispadmin_ispadmin.1.error.gz
-rw-r--r-- 1 virtual root      106410 Mar 26 10:55 Ispadmin_ispadmin.1.list.gz
lrwxrwxrwx 1 virtual root          27 Mar 26 10:55 Ispadmin_ispadmin.1.new.gz -> Ispadmin_ispadmin.1.list.gz
-rw-r--r-- 1 virtual root          51 Mar 26 10:55 Ispadmin_ispadmin.1.obsolete.gz
-rw-r--r-- 1 virtual root         440 Mar 26 10:55 Ispadmin_ispadmin.1.skipped.gz
-rw-r--r-- 1 virtual root    64043583 Mar 26 10:55 Ispadmin_ispadmin.1.tar.gz
-rw-r--r-- 1 virtual root         390 Mar 27 13:15 Ispadmin_ispadmin.2.check
-rw-r--r-- 1 virtual root         107 Mar 27 13:15 Ispadmin_ispadmin.2.error.gz
-rw-r--r-- 1 virtual root      106139 Mar 27 13:15 Ispadmin_ispadmin.2.list.gz
lrwxrwxrwx 1 virtual root          27 Mar 27 13:15 Ispadmin_ispadmin.2.new.gz -> Ispadmin_ispadmin.2.list.gz
-rw-r--r-- 1 virtual root          51 Mar 27 13:15 Ispadmin_ispadmin.2.obsolete.gz
-rw-r--r-- 1 virtual root         436 Mar 27 13:15 Ispadmin_ispadmin.2.skipped.gz
-rw-r--r-- 1 virtual root    64043616 Mar 27 13:15 Ispadmin_ispadmin.2.tar.gz
-rw-r--r-- 1 virtual root         390 Mar 29 07:47 Ispadmin_ispadmin.3.check
-rw-r--r-- 1 virtual root         107 Mar 29 07:47 Ispadmin_ispadmin.3.error.gz
-rw-r--r-- 1 virtual root      106139 Mar 29 07:46 Ispadmin_ispadmin.3.list.gz
lrwxrwxrwx 1 virtual root          27 Mar 29 07:47 Ispadmin_ispadmin.3.new.gz -> Ispadmin_ispadmin.3.list.gz
-rw-r--r-- 1 virtual root          51 Mar 29 07:46 Ispadmin_ispadmin.3.obsolete.gz
-rw-r--r-- 1 virtual root         436 Mar 29 07:46 Ispadmin_ispadmin.3.skipped.gz
-rw-r--r-- 1 virtual root    64043616 Mar 29 07:47 Ispadmin_ispadmin.3.tar.gz

Now you know that data to be restored from March 27, 2012 have number 2. You can now proceed to the restoration. Type restoration command and add number of backup at the end. This way you ensure that the last backup from March 29, 2012 will not be restored, but rather the backup from March 27, 2012.
If your backups are encrypted you will be asked for password for backups, and the system will ask you again if you want to proceed with the restoration.

ispadmin_backup source-path=/data/backup/incremental/ path=/ restore all 2

Type Postcode password : Your_password_for_backups

Restore script started.

Recover will destroy actual data on the server! Do backup before the recovery is a good idea.
Are you sure want to do the restore  - from /data/backup/incremental/ directory to /  !!?  [y/n]:

This way you can restore data from any full backup or the increments including latest full backup (if they are set).

alert icon All this providing all backups in relevant sections (ispadmin,scripts,graph,db,etc) will have the same number for respective restoration day. Otherwise data from the day corresponding to backup number will be restored. Database restoration is done from db_dump backup in import of backed-up dump file of individual databases.

Similarly to backups of individual system parts, you have the following options:

ispadmin - system ISPadmin (/data/support/ispadmin)
ispadmin_backup source-path=/data/backup/incremental/ path=/ restore ispadmin all

scripts - scripts ISPadmin
ispadmin_backup source-path=/data/backup/incremental/ path=/ restore scripts all

graph - client graphs
ispadmin_backup source-path=/data/backup/incremental/ path=/ restore graph all

etc - linux config directory
ispadmin_backup source-path=/data/backup/incremental/ path=/ restore etc all

db - database
Example: Let´s assume your ISPadmin database has been damaged due to a blackout. Today is March 30, 2012 and you know that the database could have been damaged after March 27, 2012 when the blackout happened and your server did not run.
You need to restore database as per March 27, 2012.
You have basically 3 options:

  • Restoration of entire ISPadmin

See Typical restoration, or Older backup restoration

  • Restoration of latest text backup of the system

You can restore latest text or binary backup with ispadmin_backup source-path=/data/backup/incremental/ path=/ restore db_dump all

Or you can restore a specific older backup - how to determine its number see Older backup restoration - then you run ispadmin_backup source-path=/data/backup/incremental/ path=/ restore db_dump all 2, where 2 stands for backup number. Restoration script will ask you if you really want to restore each database (press Enter).

  • Restoration of latest binary backup of the database

You can restore latest text or binary backup with ispadmin_backup source-path=/data/backup/incremental/ path=/ restore db all

Or you can restore a specific older backup - how to determine its number see Older backup restoration - then you run ispadmin_backup source-path=/data/backup/incremental/ path=/ restore db all 2, where 2 stands for backup number. Restoration script will ask you if you really want to restore each database (press Enter).

Use this option especially for cases when you need to go through backup data (e.g. to find out a presence of a certain file in older backup).

ispadmin_backup restore all

Type Postcode password : Your_password_for_backups

Restore script started.

Recover will destroy actual data on the server! Do backup before the recovery is a good idea.
Are you sure want to do the restore  - from /data/backup/incremental/ directory to /backup/  !!?  [y/n]:

Listing of /backup folder contents

ls -la /backup
total 6
drwxr-xr-x  6 root root 1024 Mar 27 11:00 .
drwxr-xr-x 33 root root 1024 Mar 27 10:53 ..
drwxr-xr-x  4 root root 1024 Mar 27 11:00 data
drwxr-xr-x  4 root root 1024 Mar 27 11:00 etc
drwxr-xr-x  3 root root 1024 Mar 27 11:00 restore_mysql_dump
drwxr-xr-x  3 root root 1024 Mar 27 11:00 usr

alert icon You have to copy a complete directory structure of backups from FTP server into a new directory, e.g. /old_server/. So if you want to restore backup No. 3 from FTP you have to copy all previous backups 1 and 2 as well.

Then carry on with restoration using the command ispadmin_backup source-path=/old_server/ path=/restore/  restore all if you are restoring into restore, or ispadmin_backup source-path=/baa/ path=/ restore all if you are restoring the real system.

alert icon Real database will be restored with backed-up data in both cases.

You may opt for restoring certain sections as well (ispadmin, etc, graph, scripts), e.g. ispadmin_backup source-path=/baa/ path=/restore/ restore ispadmin all or you can add number of backup from /old_server/.


Related articles:


System migration

alert icon The information contained in this manual pertains to the migration of ISPadmin only. It does not pertain to the migration of any other product.


Prepare new server


Download current ISO file and follow instructions on how to install ISPadmin.


1. Turn off services on old and new server


You have to turn off Apache, Cron and Nagios services on both servers so that no changes of data are made in both, system and database. You also prevent users from logging in.


/etc/init.d/apache2 stop
/etc/init.d/cron stop
/etc/init.d/nagios stop


2. Export database from old server


Create export directory


mkdir /data/backup/export


Get database password


cat /data/support/ispadmin/config/config.php | grep PASS | cut -f 3


ISPadmin database export - you will need password from previous command


mysqldump --add-drop-table --quote-names ispadmin -u ispadmin -p > /data/backup/export/ispadmin.sql


3. Copy data to new server


Rename the following directories on new server and create export directory. This way you will get a backup of original files from new installation.


mv /data/support/ispadmin/ /data/support/ispadmin_orig/
mv /usr/local/script/ispadmin/ /usr/local/script/ispadmin_orig/
mkdir /data/backup/export/


Allow old server IP


iptables -I INPUT -p tcp -s ip-stary-server --dport 22 -j ACCEPT


Recommendation: If you want to save time and transferred data we recommend you to delete graphs of client data from past years. They are in /data/support/ispadmin/client_images/, divided into years. Ideally, leave current year and delete the rest, if you don´t need it.


Copy data from old to new server Do this on the old server:


rsync -av /data/support/ispadmin/ root@ip-new-server:/data/support/ispadmin/
rsync -av /usr/local/script/ispadmin/ root@ip-new-server:/usr/local/script/ispadmin/
rsync -av /etc/ root@ip-new-server:/data/backup/export/etc/
scp /data/backup/export/ispadmin.sql root@ip-new-server:/data/backup/export/


4. Import database


alert icon  rsync daemon must be running on the new server! If not, start it with service rsync start, or install it with apt-get install rsync.


Import database dump to the new server. Default password is isp123.


mysql ispadmin -u ispadmin -p < /data/backup/export/ispadmin.sql


5. Check settings on new server


Database


Get database password transferred from the old server.


cat /data/support/ispadmin/config/config.php | grep PASS | cut -f 3


Change database password to correspond with recovered password.


/usr/local/script/ispadmin/ispadmin_change_pass.pl ispadmin ispadmin DB_password


Change DB root password to a new one, and write it down.


/usr/local/script/ispadmin/ispadmin_change_pass.pl mysql_root ispadmin new-password


Get secret from /etc/nagios3/apache2.conf


cat /etc/nagios3/apache2.conf | grep cgi-bin | cut -f 3 -d'/' | head -1


Enter secret into /data/support/ispadmin/config/config.php


nano /data/support/ispadmin/config/config.php
NAGIOS_SECRET = recovered_secret


In case of an activated Radius module follow these steps after the migration:

Find out the current password to your database with this command

cat /data/support/ispadmin/config/config.php |grep DBPASS

Write found password to /etc/freeradius/sql.conf instead of default password isp123.

nano /etc/freeradius/sql.conf


# Connection info:
server = "localhost"
login = "ispadmin"
password = "isp123"

Edit /usr/share/freeradius/dictionary file

nano /usr/share/freeradius/dictionary

If you don´t find “$INCLUDE dictionary.mikrotik“ in the file, add it to the end of the file.

Restart Radius

/etc/init.d/freeradius restart


6. Update to latest stable version


If your support is paid and you don´t have the latest stable version, run update.


ispadmin_update stable


If the update does not work and the following message appears:


HTTP request sent, awaiting response... 404 Not Found
2017-02-21 13:09:30 ERROR 404: Not Found.
gzip: stdin: unexpected end of file
tar: Child returned status 1
tar: Error is not recoverable: exiting now


use this command:


cp -av /usr/local/script/ispadmin_orig/ispadmin_update* /usr/local/script/ispadmin/


If the command does not help, please proceed according to the instructions that can be found here.


7. Turn of services


/etc/init.d/apache2 start
/etc/init.d/cron start
/etc/init.d/nagios start


8. Finish individual configuration


You have all important configuration files in /data/backup/export/etc/ (httpd.conf, hostname, hosts, rc.local). You can copy them to /etc to restore configuration e.g. on your Apache web server from the old server. Which files to use or not depends on the situation - if you are directing the new server to the same IP addresses, or you want it to have the same hostname etc.


Linux update


For reasons of compatibility and availability of future versions of ISPadmin, you have to maintain your Debian Linux version updated. This article will show you how.


First you need to find out which Linux version you are currently using. To do so, use this command.


cat /etc/debian_version


You may expect four possible scenarios based on the result of the command.


1) 7.x Current version of ISPadmin, no need for any updates System support from Debian side was announced until May, 2018.

2) 6.x.x If your version is 6, you may continue using the system, however, system updates for Debian 6 will end in February, 2016. It means no security patches will be issued, among others, and you will have to look after the system security yourself. If you want to switch to newer version, we recommend system migration instead of sole distribution upgrade.

3) 5.0.x (x represents number between 0 and 10) In this case just follow the instructions on update of debian 5 to debian 6 below.

4) 4.0 If your version is Debian 4.0, you will not be able to update Linux version without serious problems so you will need to re-install Linux from the installation DVD available at http://download.ispadmin.eu, and migrate data afterwards. You can have the migration done by our technical support, or do it yourself according to the migration instructions.


Update of Debian 5 to Debian 6


1) Enter sources to /etc/apt/sources.list as follows:


nano /etc/apt/sources.list


deb http://ftp.cz.debian.org/debian/ squeeze main non-free
deb-src http://ftp.cz.debian.org/debian/ squeeze main
deb http://security.debian.org/ squeeze/updates main contrib
deb-src http://security.debian.org/ squeeze/updates main contrib
deb http://packages.dotdeb.org squeeze all


2) Preparation for Linux update


apt-get update
gpg --keyserver keys.gnupg.net --recv-key E9C74FEEA2098A6E
gpg -a --export E9C74FEEA2098A6E | apt-key add -
apt-get update


3) Upgrade from Linux 5 Lenny to Linux 6 Squeeze


DEBIAN_FRONTEND=noninteractive apt-get -o Dpkg::Options::="--force-confdef" --force-yes -fuy dist-upgrade


4) Download of utilities necessary for update of Apache and Nagios and their application


wget http://update.ispadmin.eu/migration/php.ini-cli -O /etc/php5/cli/php.ini
wget http://update.ispadmin.eu/migration/php.ini-apache -O /etc/php5/apache2/php.ini
wget http://update.ispadmin.eu/migration/nagios-etc.tgz -O /root/nagios-etc.tgz
wget http://update.ispadmin.eu/migration/nagios-htdocs.tgz -O /root/nagios-htdocs.tgz


rm -rf /usr/share/nagios3/htdocs/*
rm -rf /etc/nagios3/*
tar xvfz /root/nagios-etc.tgz -C /etc/nagios3/
tar xvfz /root/nagios-htdocs.tgz -C /usr/share/nagios3/htdocs/
rm /root/nagios-*


sed '/NAGIOS_SECRET/d' /data/support/ispadmin/config/config.php >/tmp/config.php
sed '/\?>/d' /tmp/config.php >/tmp/config2.php
mv /tmp/config2.php /data/support/ispadmin/config/config.php
echo "NAGIOS_SECRET = nagios3" >> /data/support/ispadmin/config/config.php
echo "?>" >> /data/support/ispadmin/config/config.php


sed 's/backup\//backup\/:\/usr\/share\/nagios3\/htdocs\//' /etc/apache2/httpd.conf >/tmp/httpd.conf
mv /tmp/httpd.conf /etc/apache2/httpd.conf


5) Restart Apach and Nagios


/etc/init.d/apache2 restart
/etc/init.d/nagios restart


6) If update caused charset encoding problems in web interface, modify /data/support/ispadmin/config/config.php and /data/support/ispadmin_support/config/config.php - add row MYSQL_CHARSET=latin1


nano /data/support/ispadmin/config/config.php


MYSQL_CHARSET=latin1


High CPU load of ISPadmin server


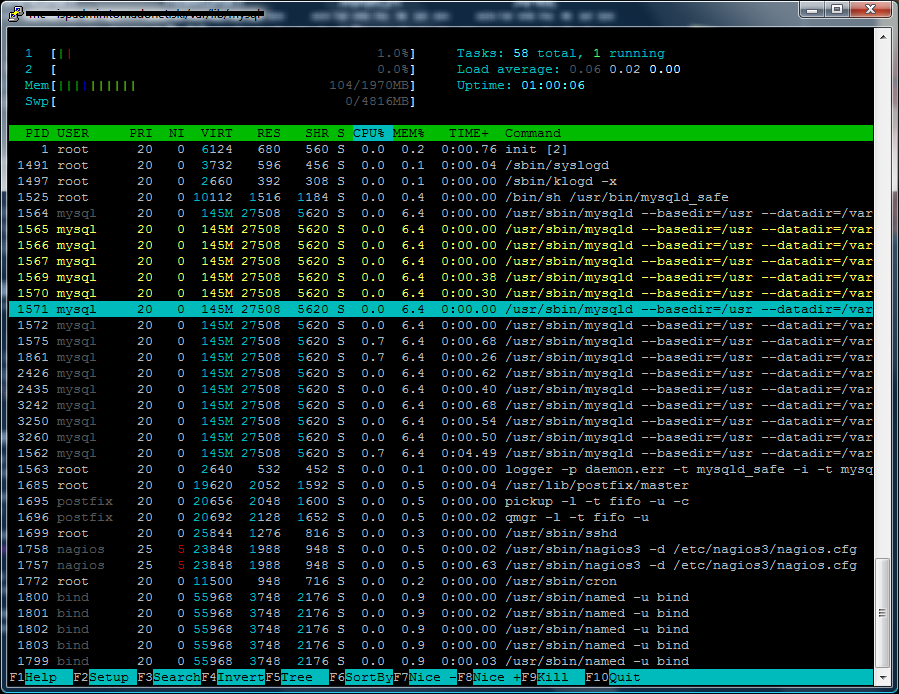
Run htop command from the Linux console to determine the problems. With this command, you can easily find out if your system is overloaded for reasons of insufficient CPU performance, small RAM, or whether processes wait too long for I/O operations with the system being paralysed by slow hard disk.

  • Insufficient RAM amount
Problem Too small RAM is installed, hence swapping to hard disk which decreases server performance.
Solution Add RAM to server.
  • Slow hard drive
Problem In htop, you can see high values in load system section, yet graphs show sufficient free RAM and CPU cores are not loaded at 100% - most likely it is a problem with insufficient write/read speed from system hard disk.
Solution Replace hard disk with SAS/SSD.
  • Small CPU performance
Problem The processor cannot deal with common tasks and keeps running at 100%.
Solution Buy more powerful server.

ISPadmin operation behind NAT

If you have your ISPadmin located on private network and wish to access it from the Internet, the easiest option for you is to set 1:1 NAT on public IP address to private address of ISPadmin.
icon info2 However, we do not recommend it since all ports and services on the server would be subject to DoS and BruteForce attacks etc.
Otherwise you have to redirect selected ports to private address of ISPadmin:

ssh TCP/22 (Port 22 is not recommended to be open, you’d better remapping it to an unexpected one (e.g. 24785 -> 22).
http TCP/80
https TCP/443

Inner/outer address on ISPadmin server

The system is typically connected to the network by one network card only. Both public, and private IP address may be used. Should you, however, wish to separate access from the Internet and from the private network, you can connect the system via 2 network cards. On the first one, there will be the public IP (the access will be allowed from selected number of IP addresses on the firewall due to security), and the second one will be connected into the private network (e.g. client portal).

Do the configuration from linux console by editing /etc/rc.local:

ifconfig eth1 192.168.168.100 netmask 255.255.255.0 route add default gw 192.168.168.1
ifconfig eth0 8.8.8.8 netmask 255.255.255.0 route add default gw 8.8.8.1

ISPadmin serving as SMTP server

By default, the SMTP server is configured in the way that it is only possible to send mail from localhost, so the server may be put onto a public IP address and nobody will be able to send their mail through it (no open relay).

ISPadmin update

Switch to new system version using the following command from command line (login via SSH):

ispadmin_update stable - update to the latest stable version

ispadmin_update beta - update to the latest beta version

You will run update script which downloads and installs the latest update of ISPadmin automatically. System administrators should not be logged in during update, since database maintenance and restart of webserver are carried out. The update is done usually within minutes based on number of clients and server perfomance. You must wait until the end of the update or you may experience problems with the system.

icon info2 Type ispadmin_update to display help.

ispadmin_update
ISP ADMIN UPDATER
(c) NET service solution, s.r.o.
Downloading version description....
Latest version:
ISP admin STABLE version: 4.17
ISP admin BETA version:
Which version are you going to install ?
Type for
STABLE VERSION ( 4.17 )
ispadmin_update stable
BETA VERSION ( - )
ispadmin_update beta
exiting.......
admin.ispadmin.cz:~#

Technical support status cannot be verified


If technical support cannot be verified, most likely it is due to DNS malfunction. In ISPadmin, DNS servers are located in /etc/resolv.conf. Check their accessibility and functioning, or enter different DNS servers, if needed.


nano /etc/resolv.conf


Malfunctioning web server could be another reason. Restarting it should resolve the issue:


 /etc/init.d/apache2 restart


Another error example is that ISPadmin server cannot contact our server with updates on port 80. In this case, verify communication at IP 95.173.193.60.


Crashed table repair

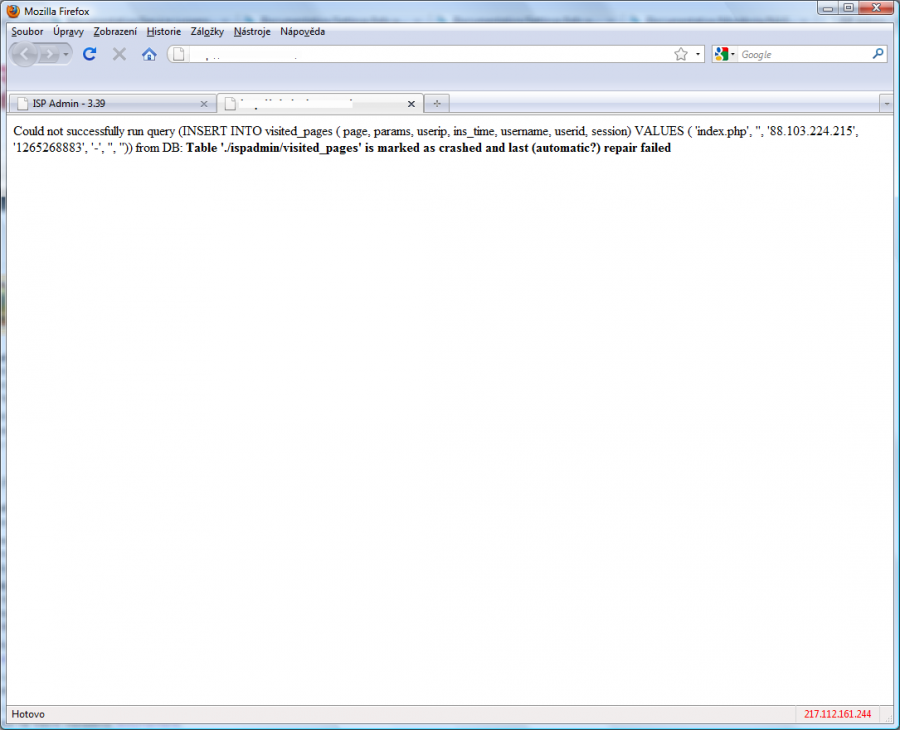
900px Db table crashIt may happen that during a "hard restart" of the server, some of the files containing the system database tables may be damaged (consider using UPS system). As a result of it, links between contacts and their services may occur, or similar problems.

If it happens you will receive error notifications on corrupted tables in the system.

Thus if you encounter the notifications while working in the system, login to the command line environment and enter the following command for repairing the table:

It is obvious from the following message that a database table has been corrupted: Table './ispadmin/visited_pages' is marked as crashed...
Use the corrupted table name visited_pages in the following command to fix it:

  • First stop the database

/etc/init.d/mysql stop

  • Reparation

myisamchk -o /var/lib/mysql/ispadmin/corrupted_table.MYI

Start the database again

/etc/init.d/mysql start

You will be able to rectify possible errors according to the example. However, it may happen that the corruption is non-repairable, and you will need to restore data from last backup. Contact technical support, or follow these instructions to restore system database.

There is a warning message function in the system that warns an administrator about a corrupted table right after login to allow for the soonest rectification possible.

You have to prevent these situations and rectify problems as soon as they arise.

Forgotten root password


You can try two ways:


First procedure

1. Insert installation DVD of ISPadmin and wait for command line to be displayed.

2. Mount system disk and switch to installation repair environment.


mount /dev/[hda1|sda1|md0] /hd
chroot /hd


3. And then change password as usual, i.e. enter it 2x.


passwd


4. Exit chroot environment and unmout disk


exit
umount /hd


5. Eject installation DVD and restart server


eject
reboot -f


Second procedure

Mount system partition and modify /etc/shadow and /etc/passwd so that root password is blank.

Enable booting from DVD drive on your computer and boot life Linux from DVD to graphical interface. Mount root of partition the password of which we are trying to recover. Search file:


/etc/passwd


Search row:


root:x:0:0:root:/root:/bin/bash


Delete letter x in it so that the row looks like this:


root::0:0:root:/root:/bin/bash


Leave remaining rows untouched and save file.

Another file to be modified is:


/etc/shadow


Search row starting with root


root:$2a$05$e7K5MayhjHODCvu6qFabq.H3QUucC0Osjas1SkbKnTlhacoW/mwFu:13528::::::


Remove all characters and leave this:


root:::: (word “root” and 4 colons)


Leave remaining rows untouched and save file.

Eject DVD and restart system. Then boot the system with forgotten password of root user. Log in as usual user and open terminal to enter


su


Now you are logged in as root and you can run this command


passwd


alert icon This command will define a new password for root user!


System Variables


System variables are used for replacing items such as client's name, address, tariff etc. with real client values into emails, SMS, invoices, reminders, contracts etc. This way you will be able to use one template to create many personalized messages, emails, and more. The template may be used for a certain client group/all clients later.

System variables are divided into categories, e.g. Client, Internet, Invoices etc., and are being pendingly added, hence no overview can be listed here. You will be able to see complete list of the variables every time you see   List of system variables.

Most commonly used for: Settings Contracts My Templates, Settings Other Email templates / SMS templates, Invoicing Settings Templates Reminders

You may also add your own variables into the system.

Text editors


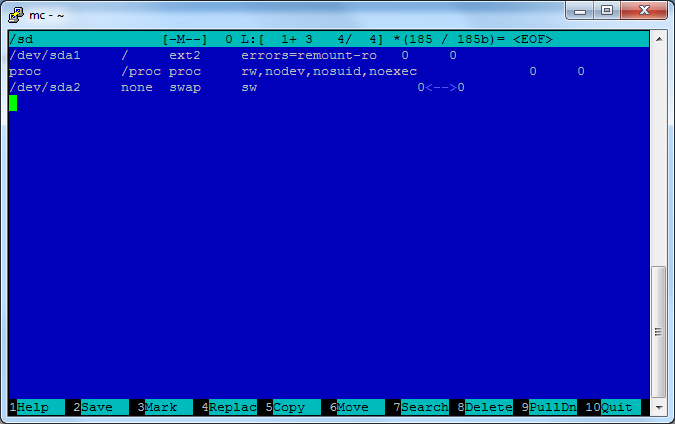
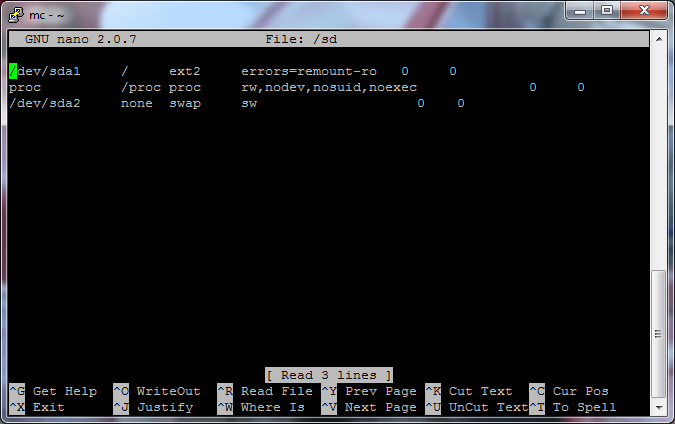
Nano text editor is always used in this documentation. If you don’t like it you can use a simple editor mcedit which is part of a well-known file manager mc - Midnight Commander


MCedit

mcedit /path/to/file

  • F2 - save changes
  • F10 - exit without changes Y/N


Nano

nano /path/to/file

  • Ctrl + x then y - save changes and exit
  • Ctrl + x then n - exit without changes

Administration of running processes


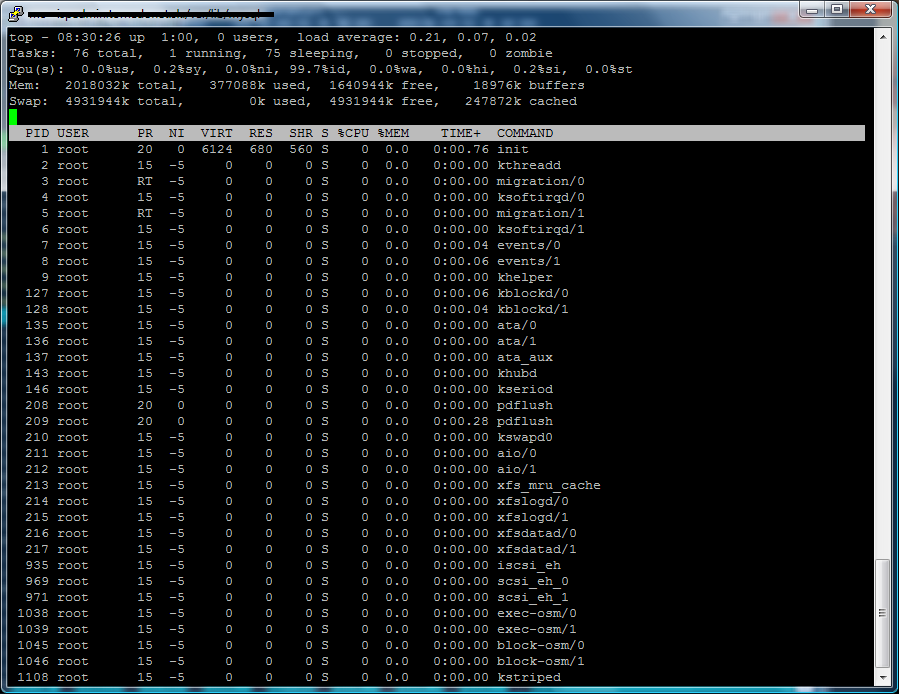
We recommend using htop program for easier monitoring of running process instead of common top.
With htop you can easily monitor use of system resources, load, uptime, but most importantly kill running processes in bulk.


Top scr Htop scr

Running service check

If you need to find out if a certain process is running use the following command:


ps ax | grep process_name


E.g. you want to know if Nagios is running.


ps ax | grep nagios
30500 ? SNsl 0:11 /usr/sbin/nagios3 -d /etc/nagios3/nagios.cfg


As you can see, Nagios is running under PID (Proces ID) 30500.


MySQL database


Restart of MySQL service


/etc/init.d/mysqld restart


Recovery of database password


cat /data/support/ispadmin/config/config.php | grep DBPASS


Database table correction


Some files with system database tables may be damaged after “hard restart” of server.
When you restart MySQL database an error message is displaying a damaged table. Thus if you encounter the notifications while working in the system, login to the command line environment and enter the following command for repairing the table:


First stop the database


/etc/init.d/mysql stop


Database table correction


myisamchk -o -f /var/lib/mysql/ispadmin/CRASHED_TABLE.MYI


Example

myisamchk -o -f /var/lib/mysql/ispadmin/accesslog.MYI
- recovering (with keycache) MyISAM-table '/var/lib/mysql/ispadmin/accesslog.MYI'
 
Start the database again


/etc/init.d/mysql start


Or you can repair tables when MySQL is running with


mysqlcheck -u ispadmin -p ispadmin


You will be asked for database password, then a complete database check will be performed, including all tables and their reparation in case of minor errors.

Repair a certain database with


mysqlcheck -r -u ispadmin -p ispadmin table_name


Timezone settings

"Europe/Prague” timezone is set by default. To change it, do the following:

Use command dpkg-reconfigure tzdata and select your option, e.g. Atlantic/Bermuda.

Then verify correct time with date

date
Fri Jul 19 12:42:56 CEST 2013
 

If time is correct timezone setup in Linux is done. Now you have to change timezone in PHP to have correct time in web interface, too.
Set it up in date.timezone item in /etc/php5/apache2/php.ini a /etc/php5/cli/php.ini. You will find the list of available timezones at: http://php.net/manual/en/timezones.php.


nano /etc/php5/apache2/php.ini


date.timezone = "America/Argentina/San_Juan"


Restart apache.


service apache2 restart


Ramdisk and RRD backup-data restoration

More on RAM disk here.


Starting RAM disk

If ramdisk is disconnected due to server outage or unexpected situation, you can start it by running the following script from ISPadmin console:


/usr/local/script/ispadmin/rrd_ramdisk.pl start force


This way you will start ramdisk and restore data from the last backup. Use [force] option to restore the data even if it is smaller than the last known data.


Restoring RRD data from backup

ISPadmin creates backups of graphs stored in ramdisk automatically once a day. 10 backups are created back.


If the data is corrupted and ISPadmin detects it (change in data size by more than 5% compared to the previous size, or disconnected disk), you can restore data to ramdisk, if initiated, or to the original directory with rrd data:


/usr/local/script/ispadmin/rrd_ramdisk.pl restore -- restores data from last backup


icon info2 If the recovery of the ramdisk data does not fix your problem, try having a look at the list of backups and choosing the largest one. Such a backup is the most likely to contain all graphs.


If you add the name of the backup to be restored behind restore (skip the leading directory, e.g. rrd_backup_2016_05_26_13_40_03.tgz), the system will restore this backup.


If you need to restore data from system backups, section script, follow instructions in restore data from scripts backups to directory, copy this backup into a directory with backups for rrd ( /usr/local/script/ispadmin/rrd_data_backup/), and then follow instructions in this paragraph.


Increasing RAM disk manually

RAM disk is maintained until 80% of its capacity. If this capacity is reached, the system will try to increase RAM disk size by 20%.
You can define RAM disk size by running the following command:


/usr/local/script/ispadmin/rrd_ramdisk.pl set size_in_MB - Set size RamDisk to

Emails cannot be sent because of their size


Check and modify the settings of the following parameters:


  • upload_max_filesize and post_max_size in /etc/php5/apache2/php.ini
  • message_size_limit in /etc/postfix/main.cf


If the set maximum size is exceeded, the system will display an error message after you click on Send.


icon info2 By default, the maximum email size is 10MB.

HTTPS Certificates

cert01

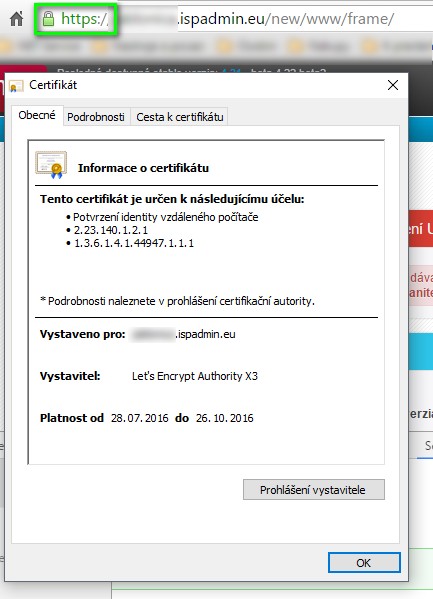
These are instructions on how to create and set up trustworthy certificates (https) for your ISPadmin installation and the Client portal. From the information in the address bar, you can find out whether the website in question is secured or not. Different browsers inform users of this fact in different ways. For example: If https appears in front of the URL/IP address of ISPadmin, then the website is secured. If https is crossed out, it is unsecured.

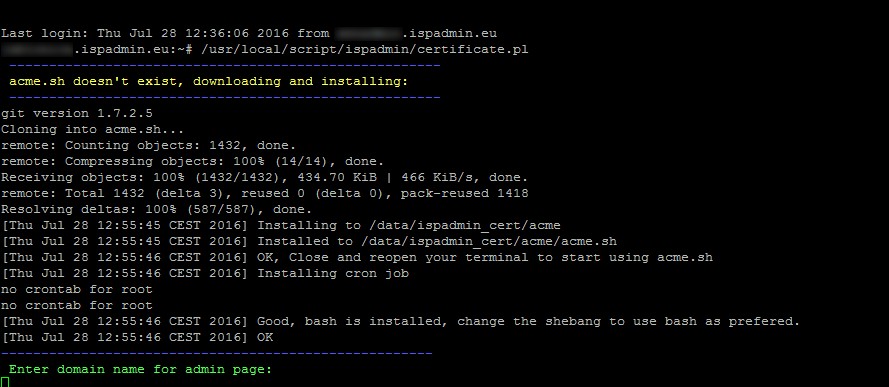
The latest version of ISPadmin incorporates a utility called certificate.pl that uses the Let´s Encrypt certificate authority to issue certificates.

Before you launch this utility, you need to have at your disposal the DNS records for the administration interface of ISPadmin (e.g. ispadmin.yourcompany.com) and for the Client portal (e.g. portal.yourcompany.com), and also enable ports 80 and 443 in SettingsSyst. settingsSecurity , Global line > HTTP 80/443 = icon check ok.

You can launch the utility with this command:

/usr/local/script/ispadmin/certificate.pl


cert01


When the script asks you to enter the DNS records for the administration interface of ISPadmin and for the Client portal, do so. Confirm your entries by Enter.


cert03


Check whether the listed IP addresses correspond to the IP address of the server. Any discrepancies would lead to an error during the creation of a given certificate. If there are indeed discrepancies, the DNS records in question must be fixed (choose the no option in the script - n) and launch the script again.


cert04


If the DNS records contain the correct IP address, certificates will be generated correctly. At this point, the script asks you whether you want to install the created certificates on the apache server. If you have made no changes to the configuration of the apache server (your own configuration), confirm by entering y . If you want to (for whatever reason) copy the certificates to the server manually, you can see in front of you the 3 locations where the individual parts are to be found. Enter n and set the certificates up manually in /etc/apache2/httpd.conf.


cert05


If you entered y, the installation of certificates was done automatically. The system also carried out the backup of the apache configuration and the restart of the apache server.

Now the certificates are valid and you can see https in the browser. Certificates are automatically renewed every 3 months.


cert06


If an error occurs during the creation of certificates, proceed as follows:


1. Back up the /etc/apache2/httpd.conf file.


cp /etc/apache2/httpd.conf /etc/apache2/httpd.conf.backup


2. Modify the file according to the code below. Enter the correct addresses for the administration interface and for the Client portal in the respective ServerName lines.


options FollowSymLinks

## ISP Admin
<VirtualHost *:80>
  ServerName admin.domain.xy
  DocumentRoot "/data/support/ispadmin/"
  AddDefaultCharset UTF-8
  <Directory /data/support/ispadmin/>
    Options ExecCGI
    AllowOverride All
  </Directory>
  CustomLog /var/log/apache2/access_support_ispadmin.log combined
  AddType application/x-httpd-php .php .php3 .php4
  php_admin_value open_basedir "/data/support/:/tmp/:/data/:/usr/local/script/ispadmin/:/data/backup/"
  php_admin_value include_path ".:/usr/local/lib/php/:/tmp/:/data/support/:/usr/local/script/ispadmin/"
  php_admin_value disable_functions  "openlog, exec, passthru, proc_open, proc_close, shell_exec"
  php_admin_value display_errors "On"
  php_admin_value safe_mode "Off
  php_admin_value safe_mode_exec_dir "/usr/local/script/ispadmin/"
  php_admin_value safe_mode_allowed_env_vars none
  php_admin_value safe_mode_include_dir ".:/usr/local/lib/php/:/tmp/:/data/support/:/usr/local/script/ispadmin/"
  php_admin_value register_globals "On"
  php_admin_value sendmail_path "/usr/sbin/sendmail -t -i -f This email address is being protected from spambots. You need JavaScript enabled to view it."
</VirtualHost>

## ISP Admin support
<VirtualHost *:80>
  ServerName clientportal.domain.xy
  DocumentRoot "/data/support/ispadmin/new/www/clientinterface/"
  AddDefaultCharset UTF-8
  <Directory /data/support/ispadmin/new/www/clientinterface/>
    Options ExecCGI
    AllowOverride All
  </Directory>
  CustomLog /var/log/apache2/access_support_ispadmin_support.log combined
  AddType application/x-httpd-php .php .php3 .php4
  php_admin_value open_basedir "/data/support/ispadmin/:/tmp/:/usr/local/script/ispadmin/"
  php_admin_value include_path ".:/usr/local/lib/php/"
  php_admin_value disable_functions  "openlog, exec, passthru, proc_open, proc_close, shell_exec"
  php_admin_value display_errors "On"
  php_admin_value safe_mode "Off"
  php_admin_value register_globals "On"
</VirtualHost>


If the following error occurs


Server error 500


it will be necessary to modify the configuration file /etc/php5/apache2/php.ini (see the picture below) and then restart apache (service apache2 restart).


session


Error "Allowed memory size of ... bytes exhausted ..."

Fatal error: Allowed memory size of ... bytes exhausted (tried to allocate ... bytes) in ... on line ...


If such an error message appears, set a higher value in the memory_limit item in the PHP configuration file (/etc/php5/apache2/php.ini).


Manual update

If the Error 404: Not Found message appears during an update, it will be necessary to do it manually:


cd /tmp

# for beta version
wget http://www.ispadmin.cz/update/update_ispadmin_ion_beta_AddHashHere.tgz

# for stable version
wget http://www.ispadmin.cz/update/update_ispadmin_ion_AddHashHere.tgz

tar zxfv DownloadedFile.tgz

cd ispadmin_update

./update.pl

CONTACT

NET service solution, s.r.o.
Žerotínova 3056/81a
787 01 Šumperk
Czech Republic